Setup guides
At October 3rd the printers around the university will be replaced with new ones. This means that you as a mac user will have to uninstall the old printer software and install the new one. If you have a computer that's not installed by IT you may need to install the printer manually.
You can no longer send printed documents to print-and-collect queue outside the university network. The alternative is to use the Papercut webb
Uninstall the old iprint-client on MAC
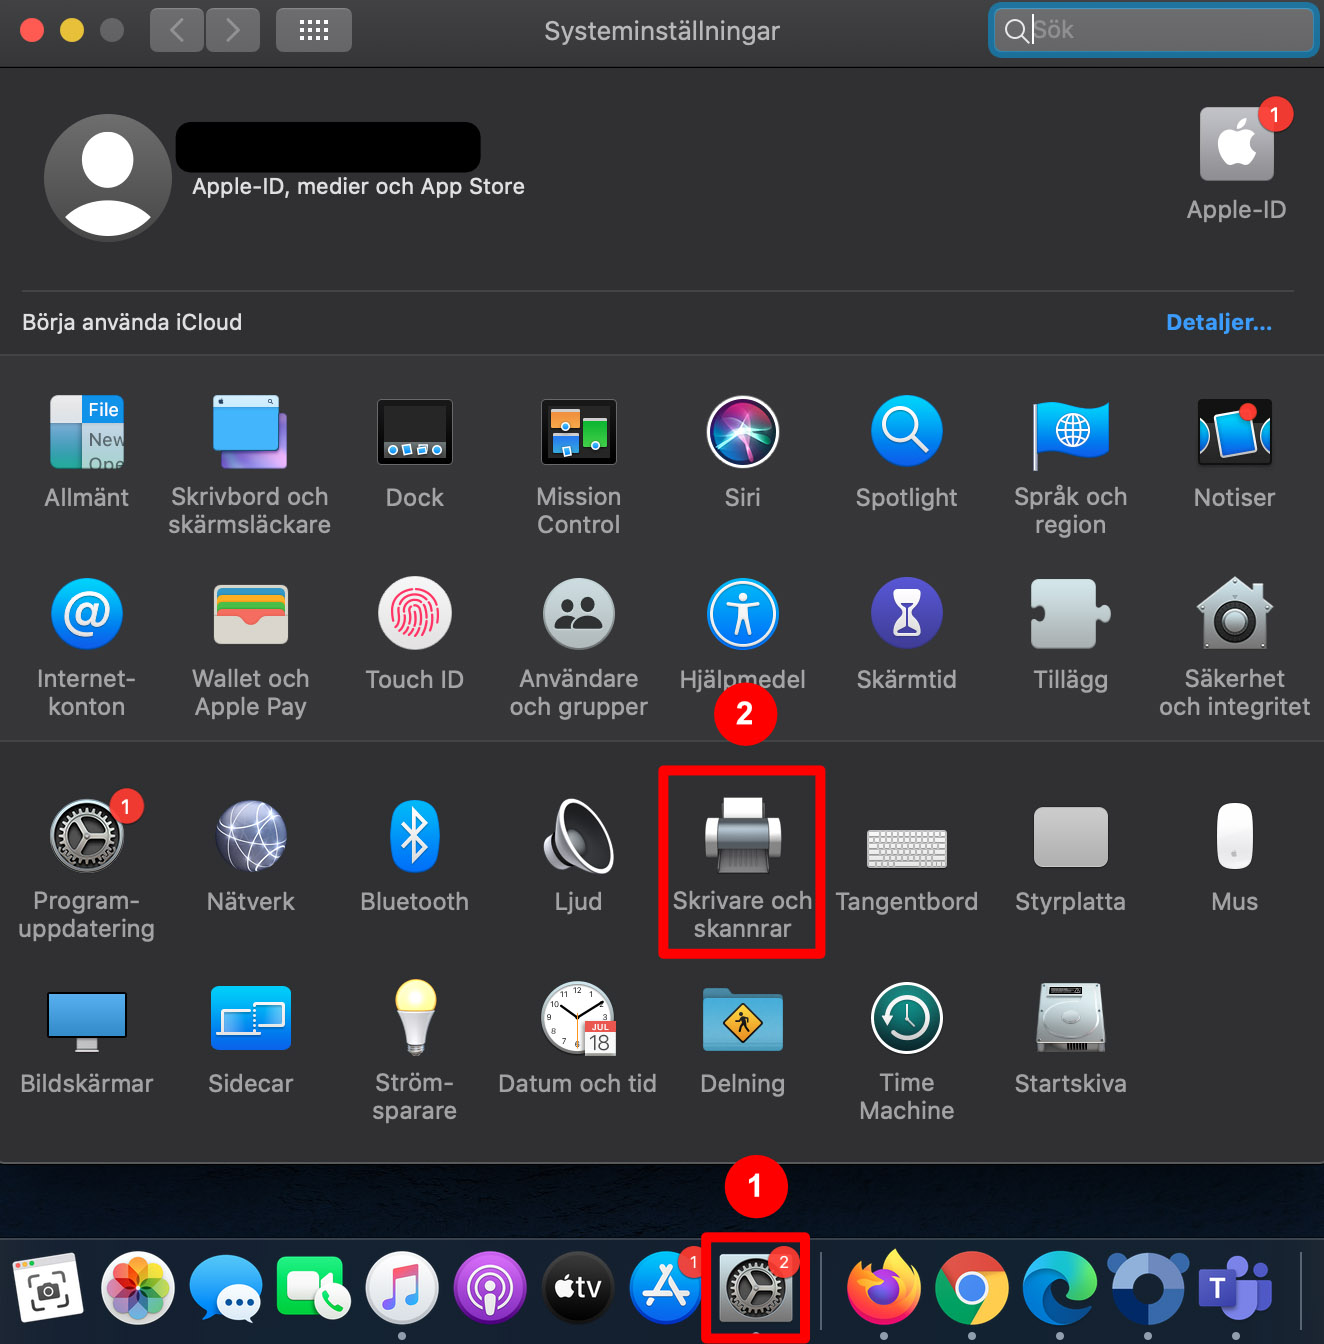
1. Go to System Preferences > Printer and Scanners
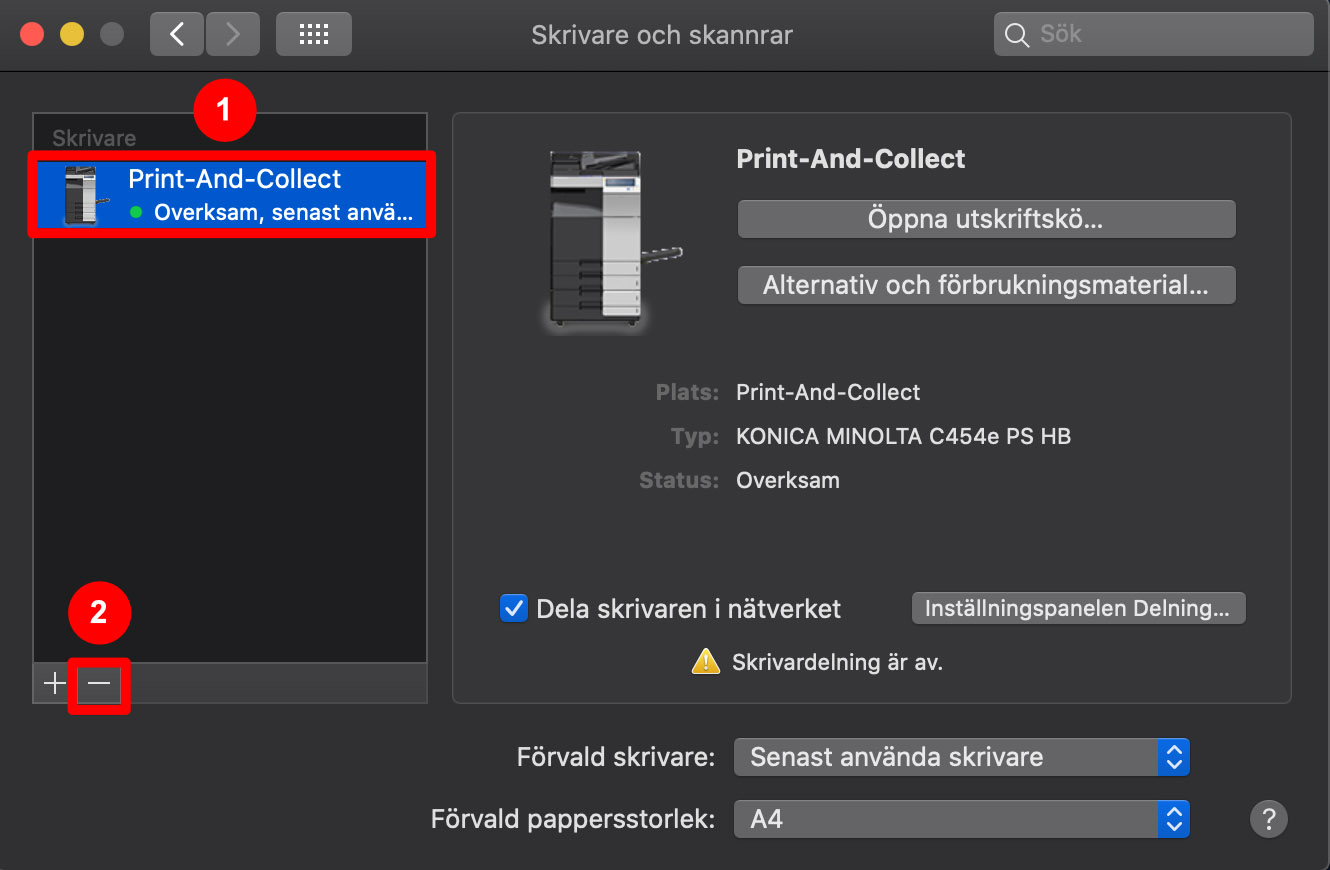
2. Press on Print-and-Collect in the menu and press the minus sign and choose remove printer
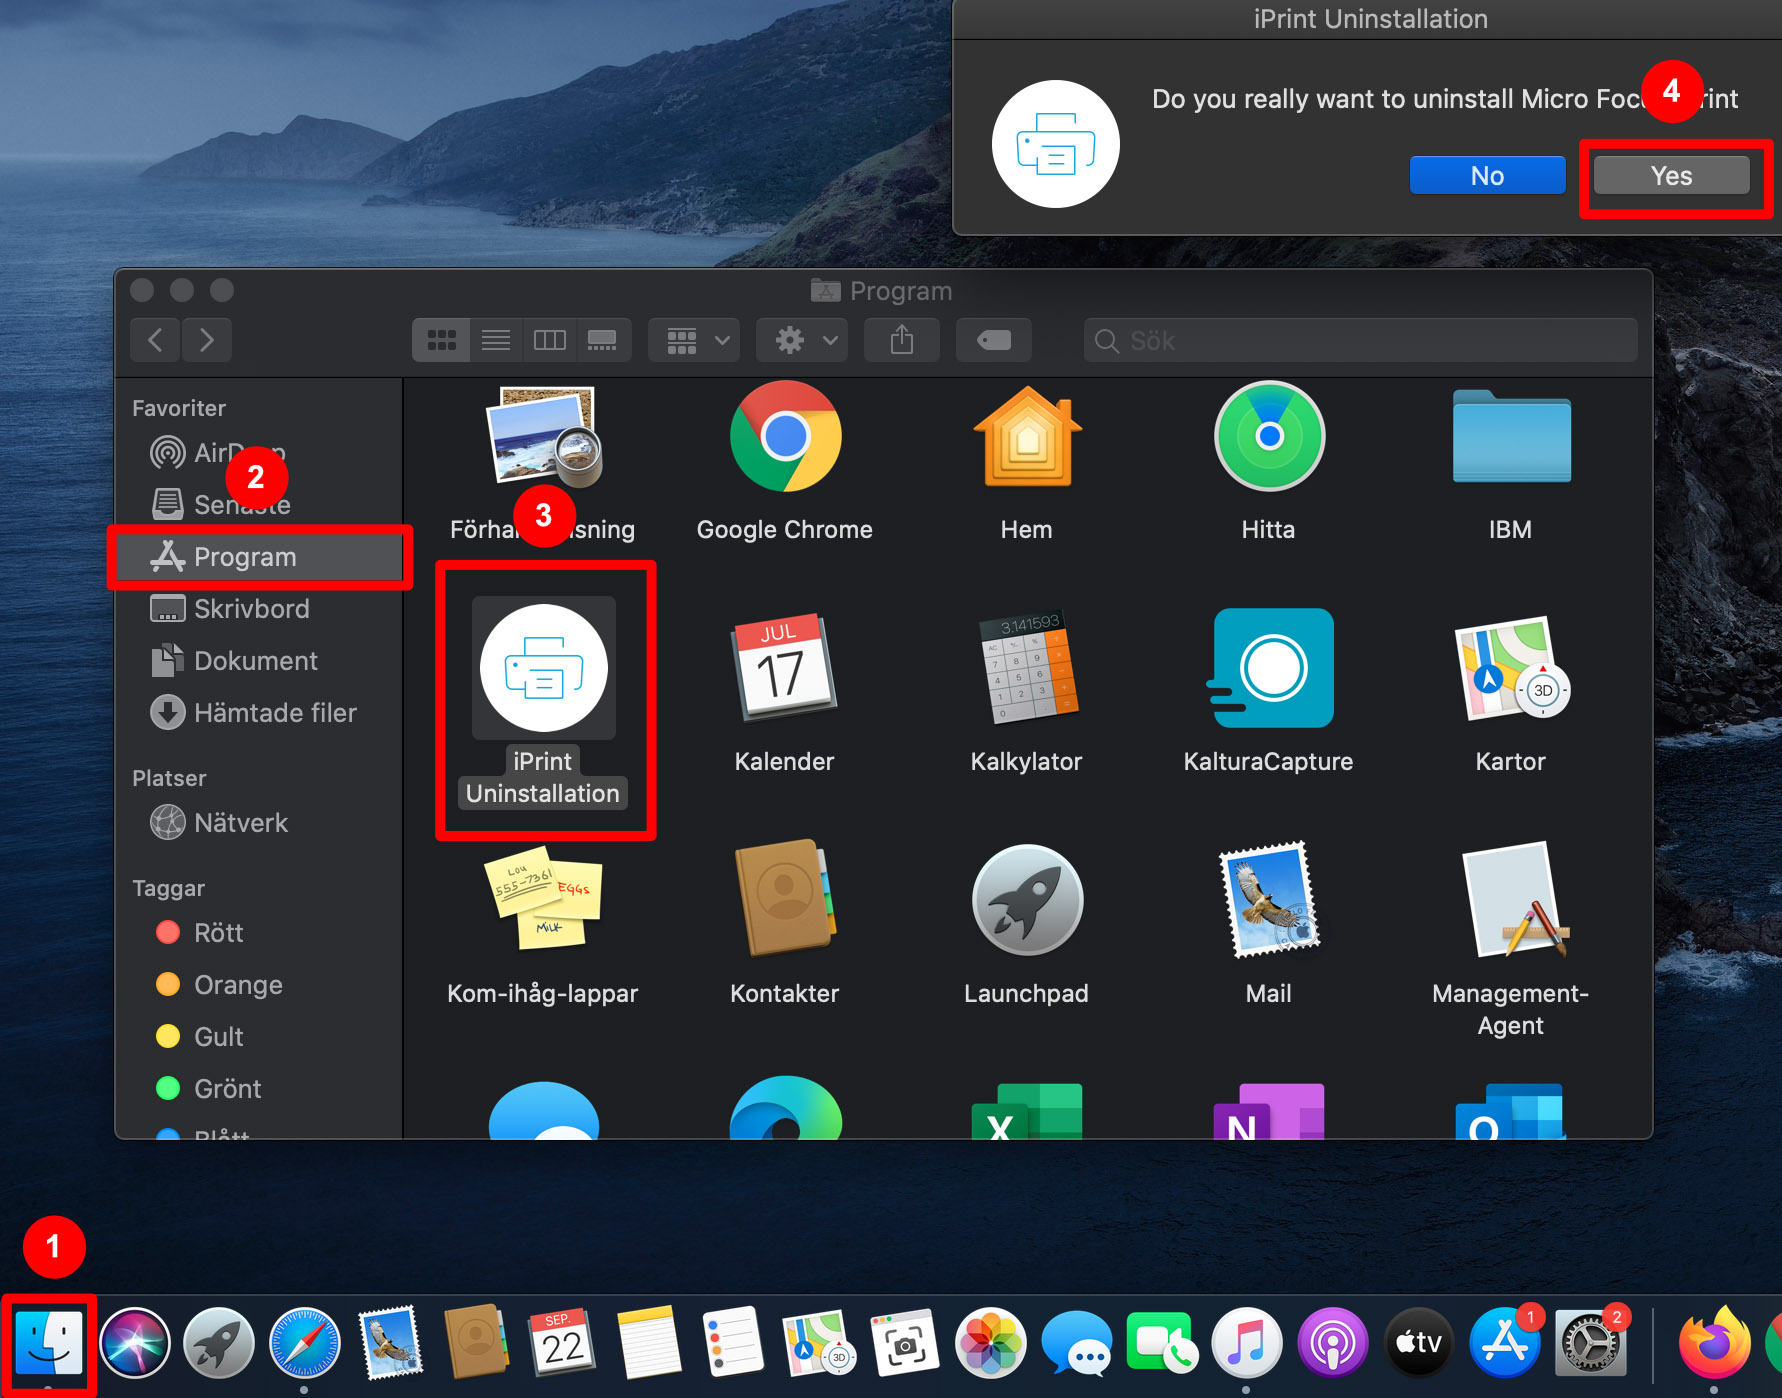
3. Go to Finder > program and choose "iPrint Uninstallations" and then yes
4. Now you have uninstalled the old printer software. Follow the steps below to install the new printer.
Install new printer on MAC
It's important that you're connected to the university network when you install the new printer.
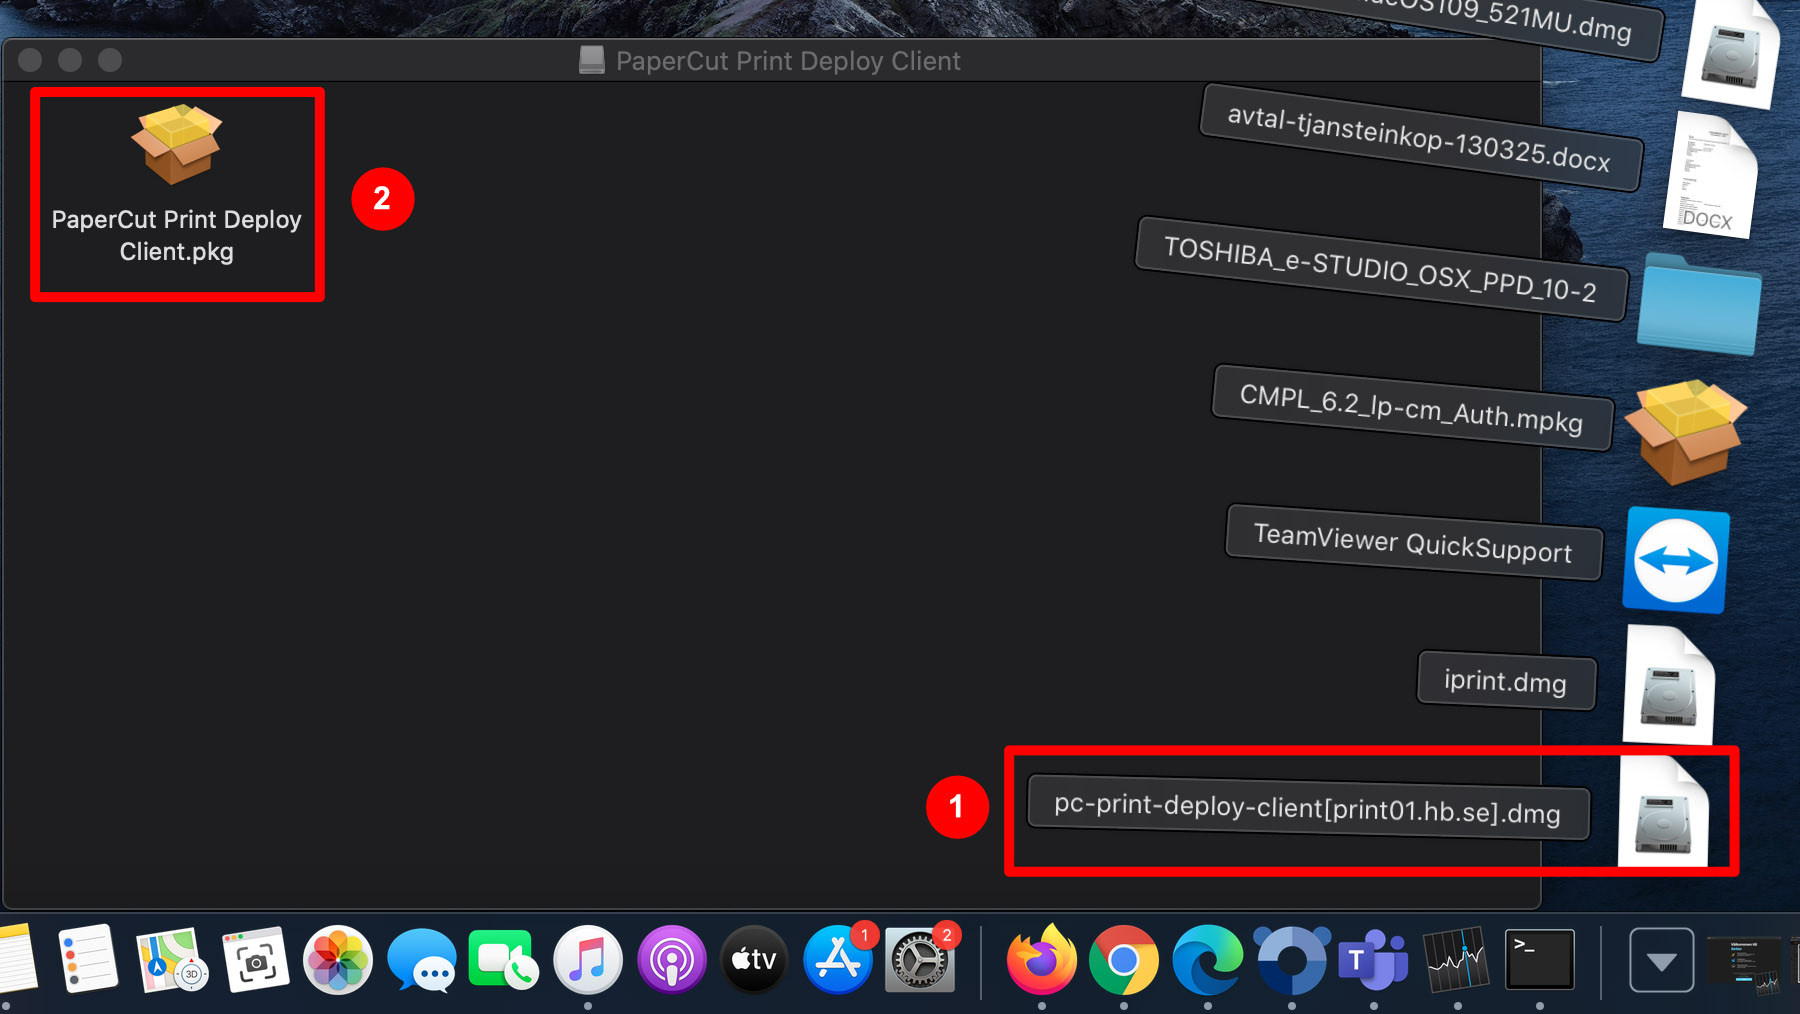
1. Download the installation package
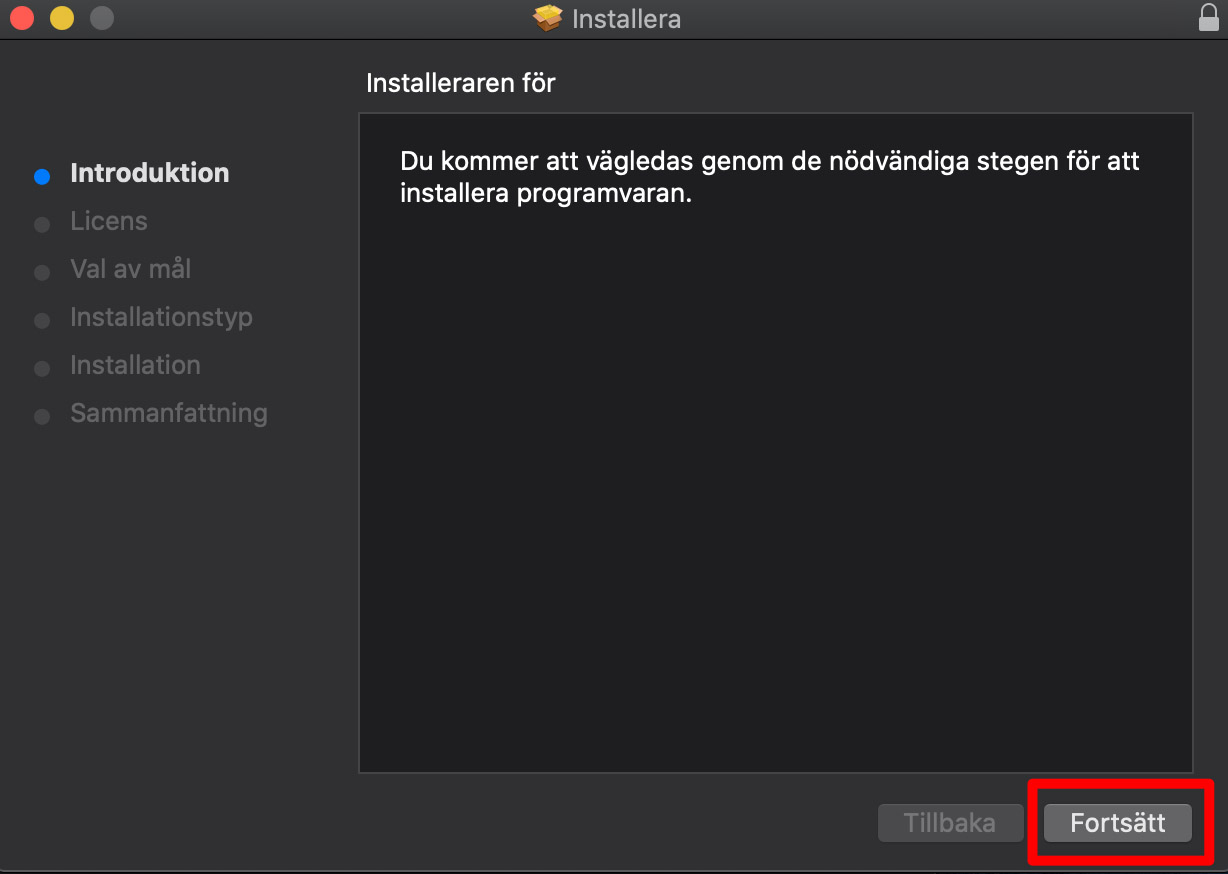
2. Proceed through the installation steps
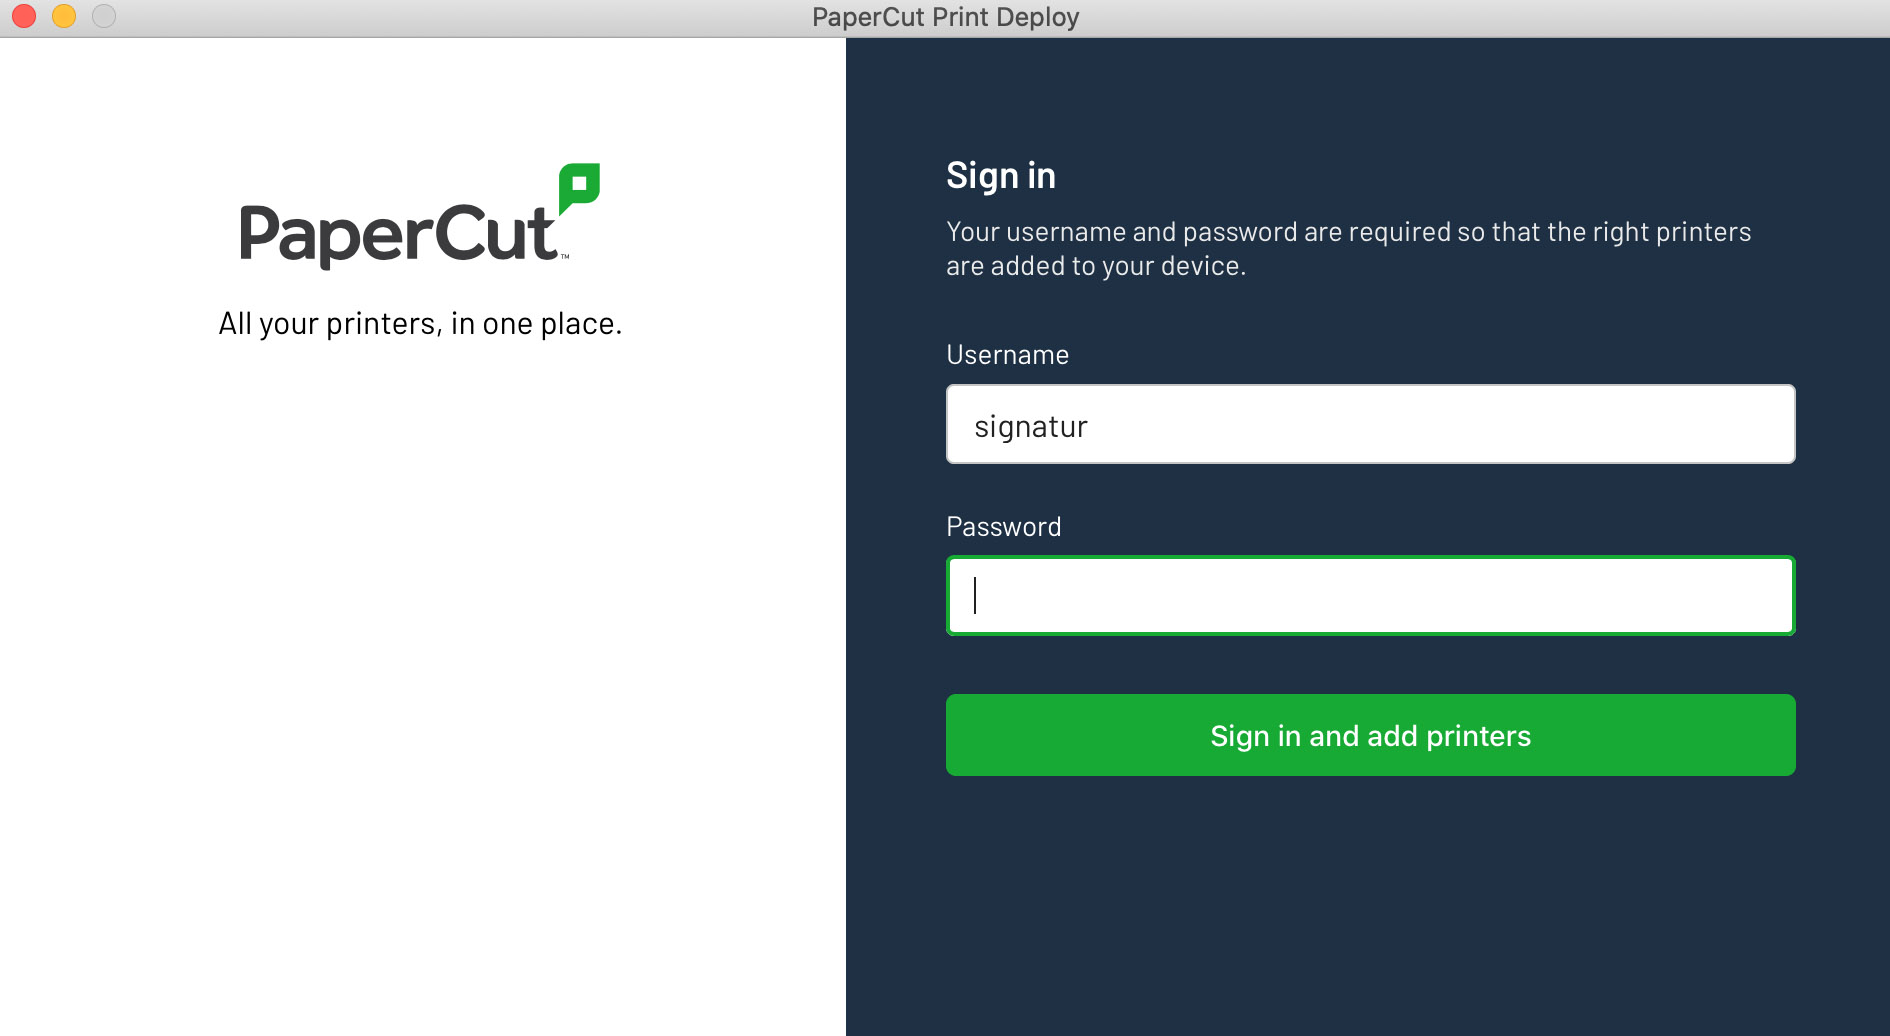
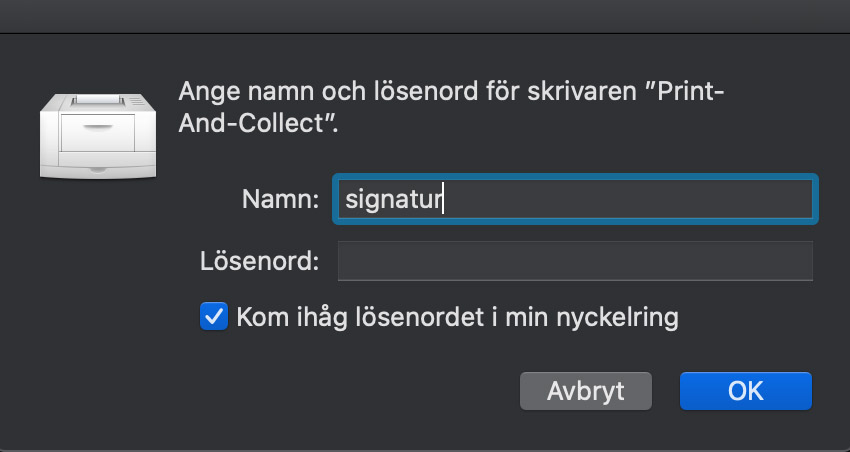
3. After the installation a login screen will appear. Login with your signature and hb-password
4. Now you logged in and the printer will be installed.
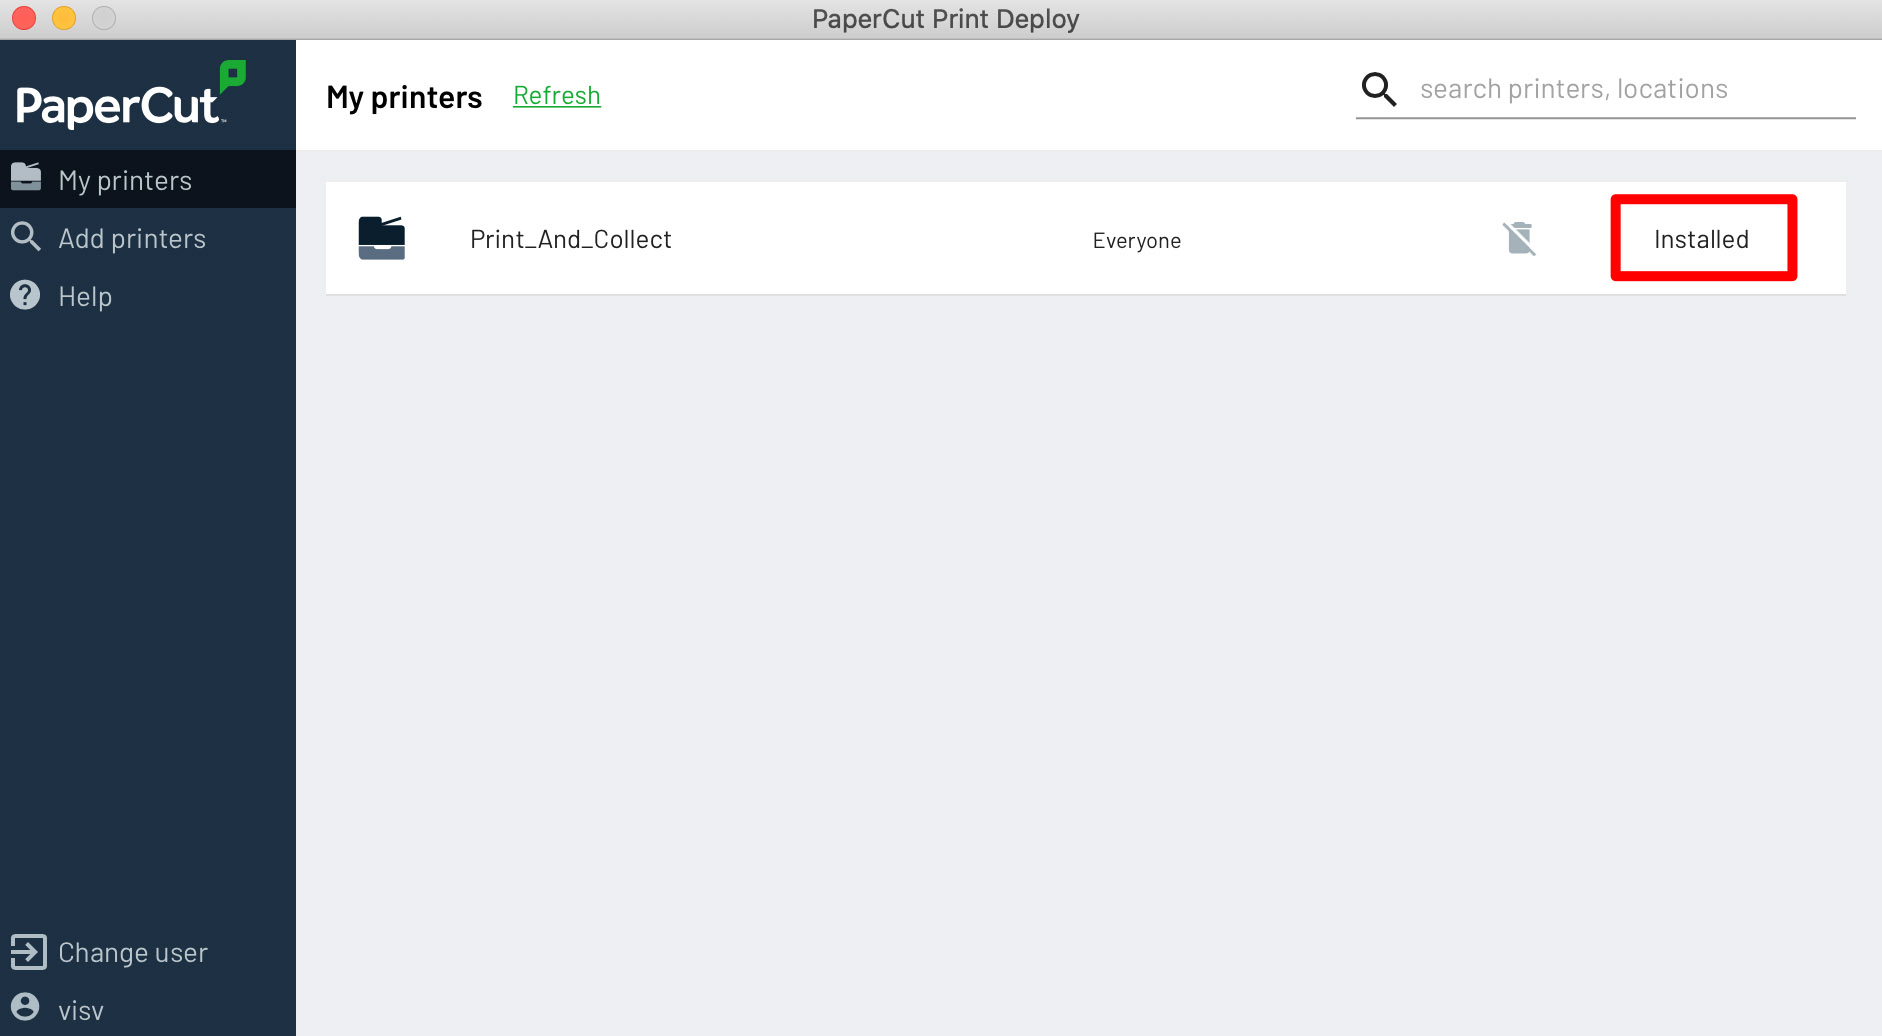
5. Now the printer queue is installed. The first time you try to print a document a login screen will appear. There you write your signature and hb-password
Install new printer manually PC
It's important that you're connected to the university network when you install the new printer.
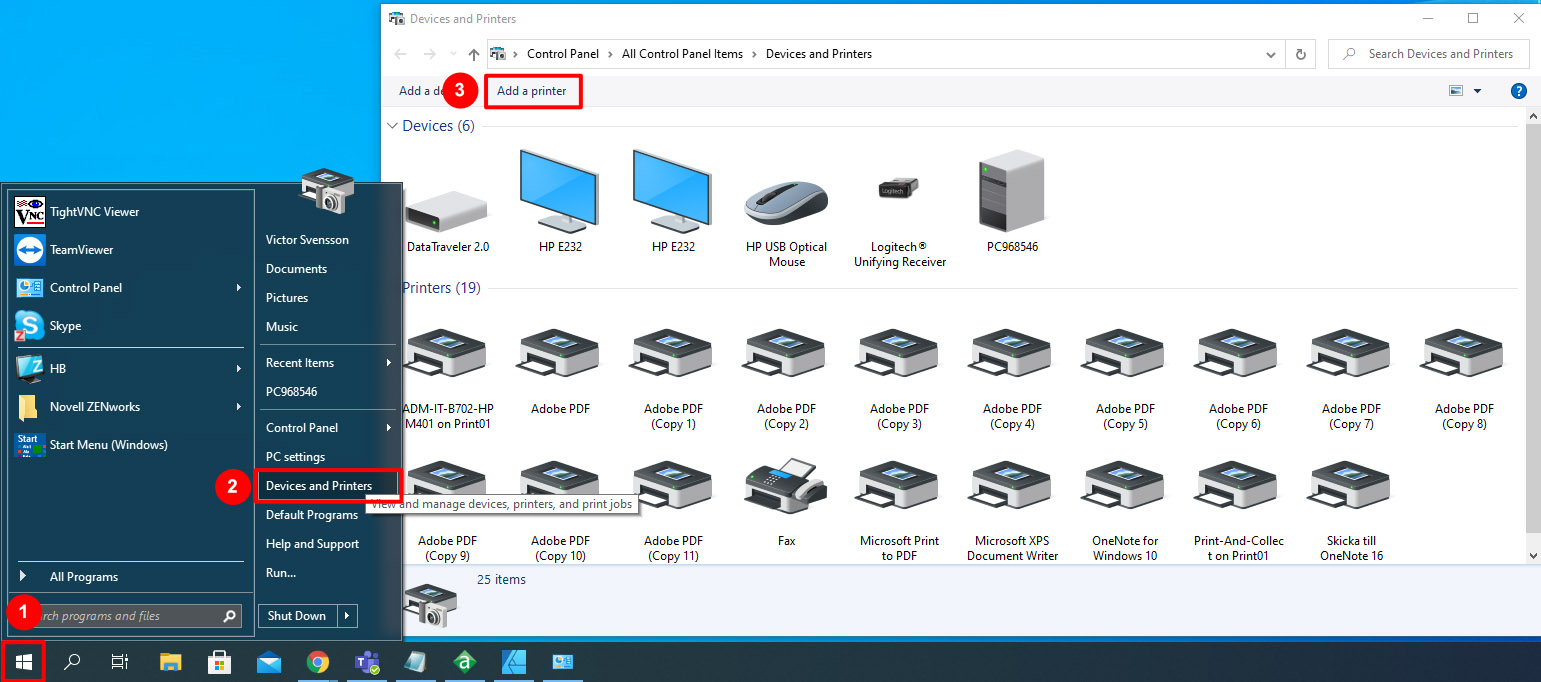
- Select Start
- Select Devices and Printers
- Select Add a printer
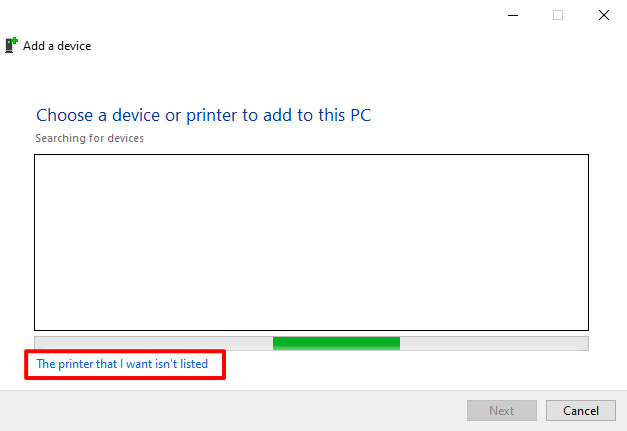
- Select The printer that I want isn't listed
- Check the Select a shared printer by name
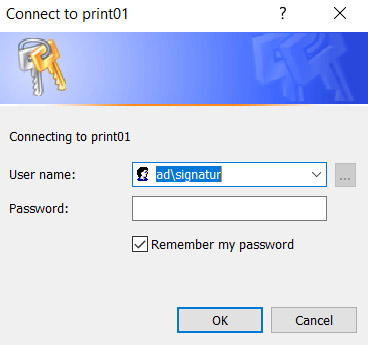
- In the field type \\print01\Print-And-Collect and press Next
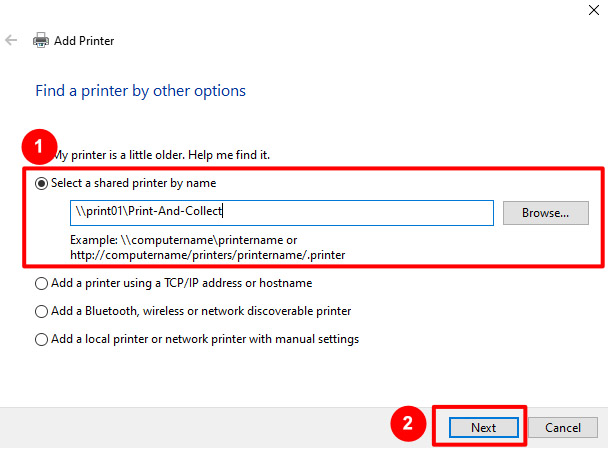
- If a login screen appears you type ad\yoursignature and hb-password